Starting a new topic? Please try and put it in a relevant forum (Riding, Building, etc) but if you're not sure it's better to post in any forum than not to post at all. |
Fiberglass reinforcements on Quest wheelbox |
Post Reply 
|
| Author | |
antonin_d 
Visitor (new) ")
Joined: 10 April 2017 Status: Offline Points: 63 |
 Post Options Post Options
") Thanks(0) Thanks(0)
 Quote Reply Quote Reply
 Topic: Fiberglass reinforcements on Quest wheelbox Topic: Fiberglass reinforcements on Quest wheelboxPosted: 14 December 2020 at 11:18am |
|
Hi all, This week I am going to do my first fiberglass job, to reinforce the wheel-box of my Quest, where the swing-arm connects. I damaged this part in a recent trip and following Velomobiel.nl's advice I will reinforce the part with 10 layers of 200g/m2 fiberglass. It feels exciting but also a bit daunting since it's pretty important that I get it right! A tricky part is to get the velomobile in a heated workshop - I will have to get it through a window, via a ramp made out of scaffolding parts. I hope to be able to take pictures of this adventure for you all to enjoy… Wish me luck ^^ Antonin
Edited by antonin_d - 14 December 2020 at 11:21am |
|
 |
|
|
Yanto
Moderator Group 

Joined: 11 July 2005 Status: Offline Points: 1521 |
Post Options
Thanks(0)
Quote Reply
Posted: 14 December 2020 at 9:55pm |
|
Good luck!
Look forward to seeing your access ramp. Regarding the fibreglassing, it is very straightforward, prepare your cloth before mixing the resin, are you using epoxy? Mix the resin to the correct ratios, wet the area you are going to fibreglass (after roughing with abrasive cloth and cleaning with acetone), wet the first layer of cloth just enough resin to make it transparent and apply to the area previously wetted, do the same for each layer making sure all air is removed. a common mistake (and i still do it) is putting too much resin on the cloth, if you can once all layers are applied compress the area or ensure it has been rolled to remove excess resin. Ian
|
|
|
|
|
atlas_shrugged
BHPC Member 
Joined: 03 November 2014 Location: Cambs Status: Offline Points: 1025 |
Post Options
Thanks(0)
Quote Reply
Posted: 16 December 2020 at 12:41pm |
|
I am no expert on this but I have seen this being done. For the final layer you can put PeelPly material on and then use a small roller (approx. 5cm wide) to squeeze the excess resin through the PeelPly. Then later the PeelPly is removed.
Lee may look at this thread later to add/correct anything I have said. Allez mon brave. Edited by atlas_shrugged - 16 December 2020 at 12:51pm |
|
|
|
|
Yanto
Moderator Group
Joined: 11 July 2005 Status: Offline Points: 1521 |
Post Options
Thanks(0)
Quote Reply
Posted: 18 December 2020 at 7:40am |
|
Use of Peel ply provides either an aesthetically pleasant finish (matt) by covering inconstancies of resin thickness or as a key for further work, it's not vital. It can however make final rolling easier and absorb some excess resin.
Edited by Yanto - 18 December 2020 at 7:41am |
|
|
|
|
antonin_d
Visitor (new)
Joined: 10 April 2017 Status: Offline Points: 63 |
Post Options
Thanks(0)
Quote Reply
Posted: 23 December 2020 at 8:59pm |
|
So, I gave it a go. I have ridden 200km with it and I am pleased with the stiffness! This is the original damage, seen from the wheel side: 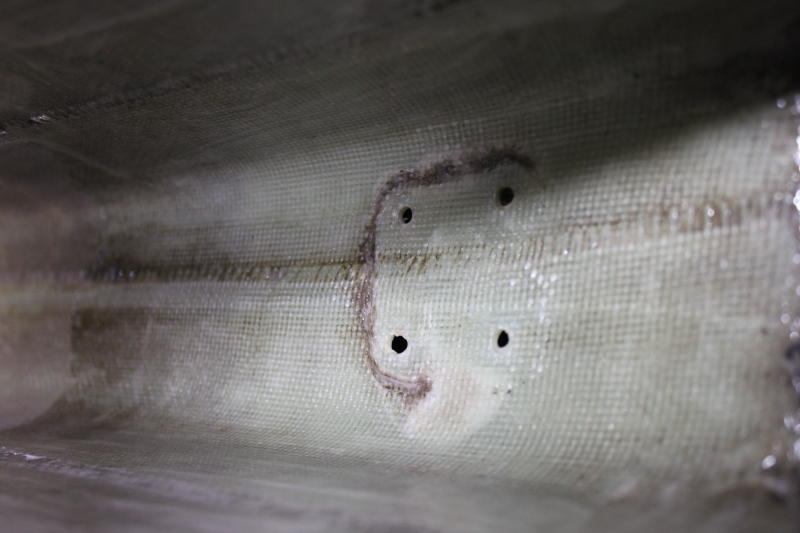 Even
though Velomobiel.nl told me that it should be enough to reinforce the
wheelbox on the wheel side only, I thought it would not hurt to add a
few layers on the swingarm side, so that the damaged area is sandwiched
between layers of new fibers. 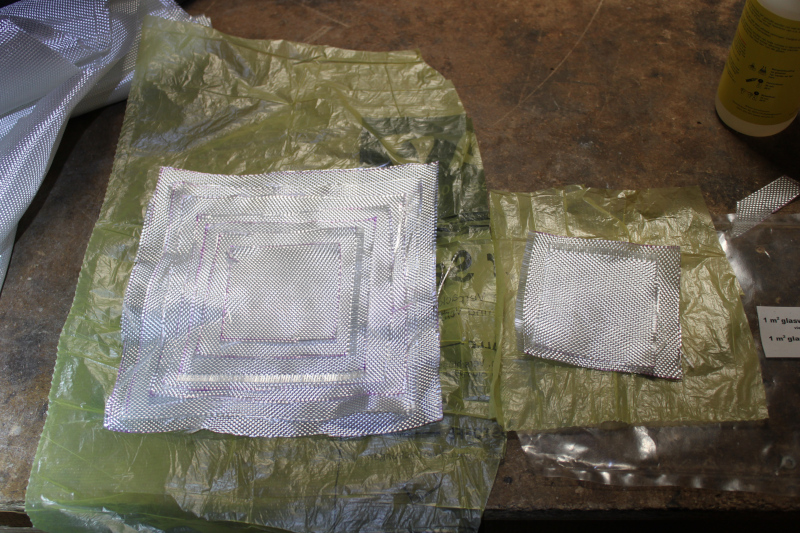 With two layers on that side it did not
seem to move the swingarm mount point too much (the position can be
adjusted on the other mount point anyway). It does mean that I should
now paint it again, but that can wait a bit. 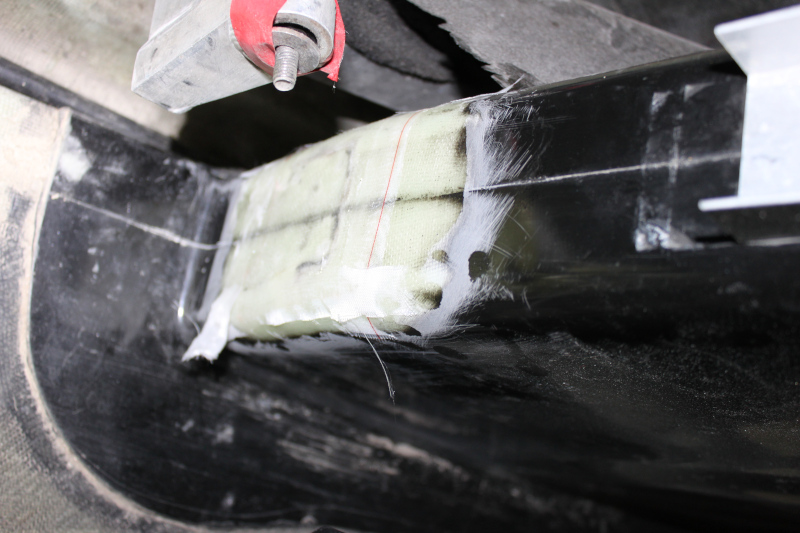 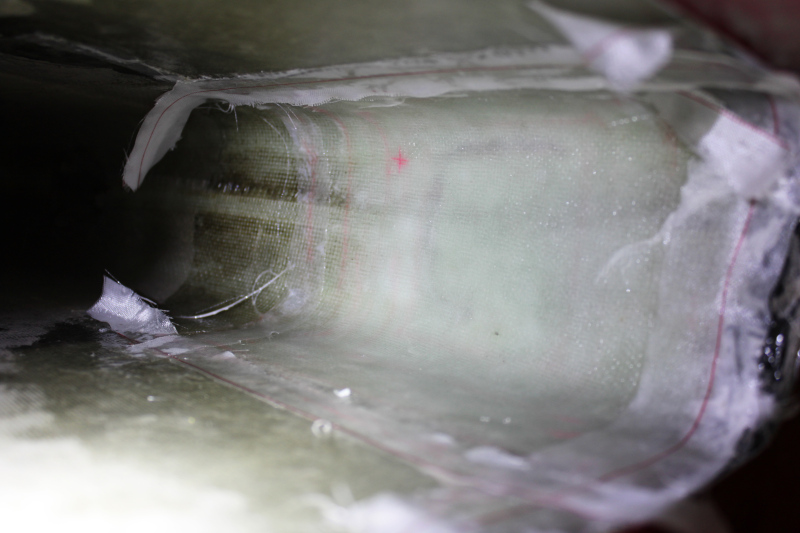 I am pretty sure I fell in the trap of putting too much resin, but oh well, I'll optimize for weight another time… In
the end, friends helped me get the velo in the workshop so we did not
have to build any structure to get it through the window. The curing
process was pretty interesting, it was a bit of a challenge to keep the
temperature at 20°C for 24h but after some fiddling with various heating devices it worked (yes I was so desperate that I did consider lighting candles!) |
|
|
|
|
atlas_shrugged
BHPC Member
Joined: 03 November 2014 Location: Cambs Status: Offline Points: 1025 |
Post Options
Thanks(0)
Quote Reply
Posted: 23 December 2020 at 9:28pm |
|
Bien Fait. Any photos of getting this into the workshop or is this classified?
|
|
|
|
|
antonin_d
Visitor (new)
Joined: 10 April 2017 Status: Offline Points: 63 |
Post Options
Thanks(1)
Quote Reply
Posted: 24 December 2020 at 7:18am |
|
Sadly we did not have enough hands for the velomobile and the camera! But this is how it looked in the workshop:  |
|
|
|
|
Yanto
Moderator Group
Joined: 11 July 2005 Status: Offline Points: 1521 |
Post Options
Thanks(0)
Quote Reply
Posted: 26 December 2020 at 6:03pm |
|
Well done, it's not as daunting as first it may seem, hopefully
 |
|
|
|
|
Post Reply
|
|
| Tweet |
| Forum Jump | Forum Permissions You cannot post new topics in this forum You cannot reply to topics in this forum You cannot delete your posts in this forum You cannot edit your posts in this forum You cannot create polls in this forum You cannot vote in polls in this forum |


 Topic Options